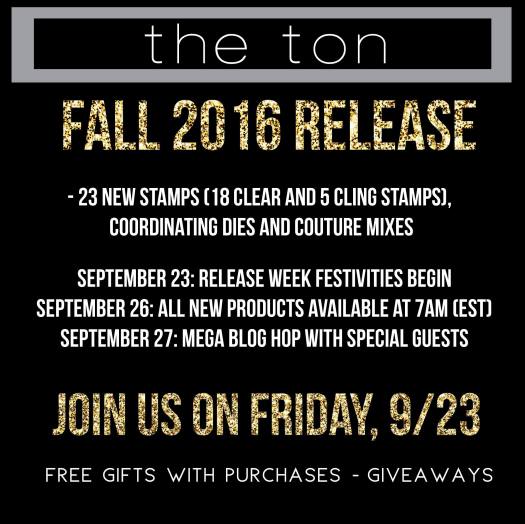
Hello, everyone! Welcome to The Ton 2016 Fall Release Blog Hop!
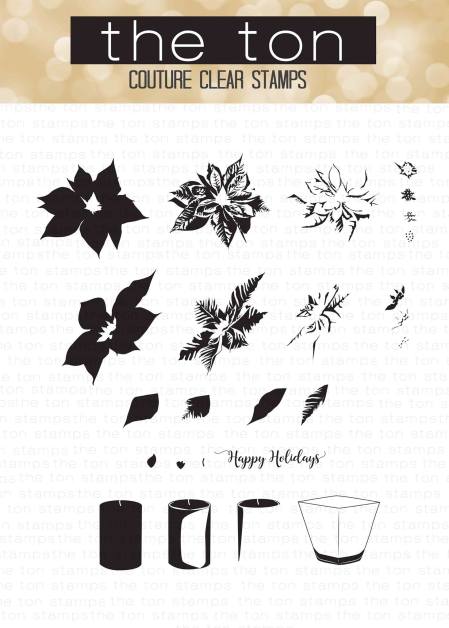
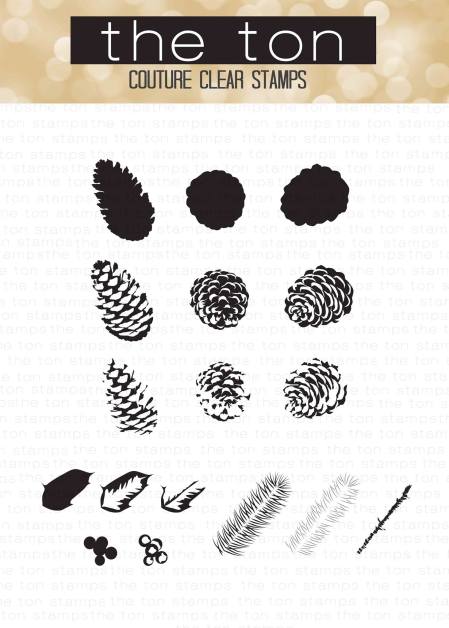
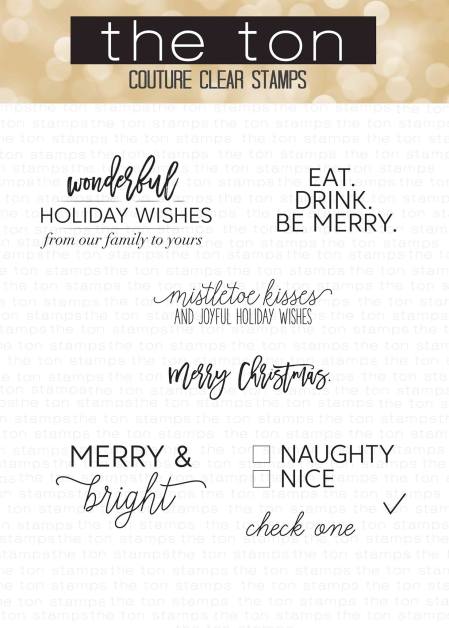
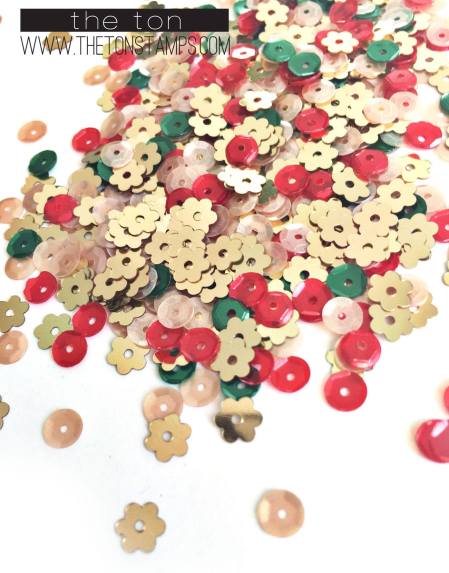
The Ton has 23 new stamps for their Fall 2016 Release (18 clear stamps, 5 rubber cling) There are two new gifts with purchases for this release! For all purchases of $75 (before taxes and shipping), Effie will include our new Hazelnut Kisses Couture Mix with your order. For all purchases over $100 (before taxes and shipping), Effie will include the Hazelnut Kisses mix and a mini 2×3 Christmas Poinsettia set in your order! This promotion does not apply to prior purchases and is only available until October 3 or until supplies last.


Hazelnut Kisses Couture Mix and Christmas Poinsettia, 2×3 Incentive Stamp
All new release products (stamps, gilding, and coordinating dies) are available now!
We’ve shown you the fabulous new products during the past 4 days. As a grand finale of our 2016 Fall Release week, we are having a blog hop with incredible guests!
The order of the hop is as follows:
- The Ton https://thetonstampsblog.wordpress.com/2016/09/27/fall-2016-release-blog-hop
- Amy Tsuruta http://tsurutadesigns.blogspot.com/2016/09/the-tons-fall-2016-release-blog-hop.html
- Mayline Jung http://wp.me/p3gieN-29w
- Emily Midgett http://sixthstreetsundries.blogspot.com/2016/09/the-ton-september-release-blog-hop.html
- Laura Sterckx http://makingcardsisfun.com/2016/09/the-tons-fall-2016-release-blog-hop.html
- Eunji Jung http://eunjoa.blogspot.com/2016/09/the-ton-fall-2016-release-day-blog-hop.html
- Chris Daytonhttp://www.cattalesandpapertrails.com/2016/09/save-date.html
- Vera Yates http://lingshappyplace.blogspot.com/2016/09/the-ton-fall-2016-release-blog-hop.html
- Lisa Harrolle http://lisaembellishmyworld.blogspot.com/2016/09/the-tons-fall-2016-release-blog-hop.html
- LauraJane Head http://ahiaf.blogspot.com/2016/09/tt-release-day-blog-hop.html
- Carisa Wiley http://www.sprinkledwithglitter.com/2016/09/sentiments-that-sparkle-tons-fall-2016.html
- Jenny Lee Yamasaki <—- You are Here! 🙂
- Lydia Fiedler http://understandblue.blogspot.com/2016/09/cheers.html
- Janette Kausen http://janettekausen.com/2016/09/12/the-ton-fall-release-blog-hop/
- Kymona Tracey https://kreativekymona.com/2016/09/27/the-tons-fall-2016-release-blog-hop/
- Justine Hovey http://www.justinehovey.com/2016/09/the-tons-fall-2016-release-blog-hop.html
- TaeEun Yoo http://rainbowinnovember.blogspot.com/2016/09/the-ton-2016-fall-release-blog-hop.html
- Laurel Beard http://wp.me/p59T5f-3jf
Make sure to leave comments to all of the blog hop participants for giveaways!
Giveaway Details:
Four $25 gift certificates will be given away to random commenters on all the hop participant blogs. The comment period will close on Thursday, September 29th at 11:59pm. Winners will be announced thereafter.
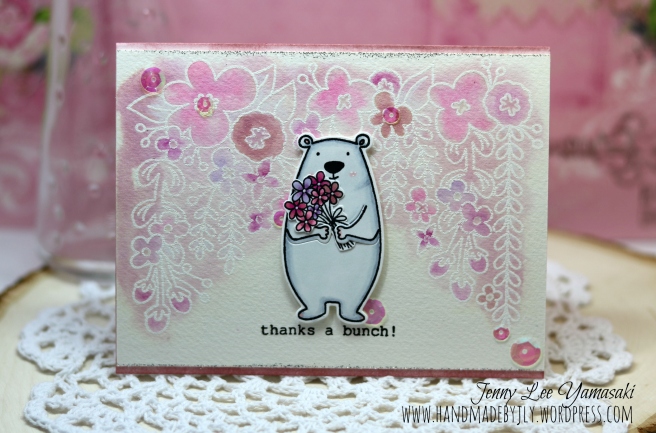
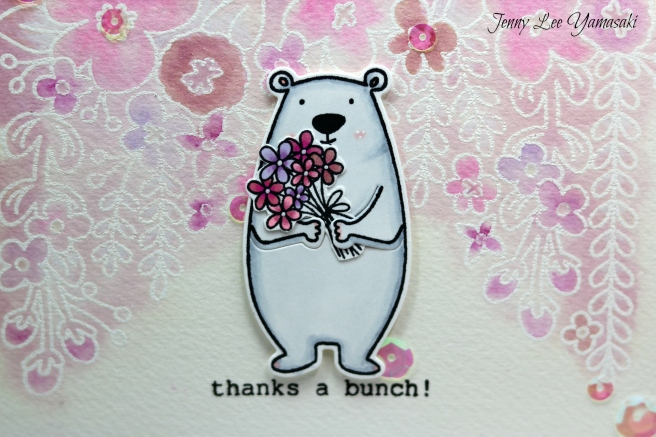
Now, without further ado, let me introduce you the 2 cards I’ve created!
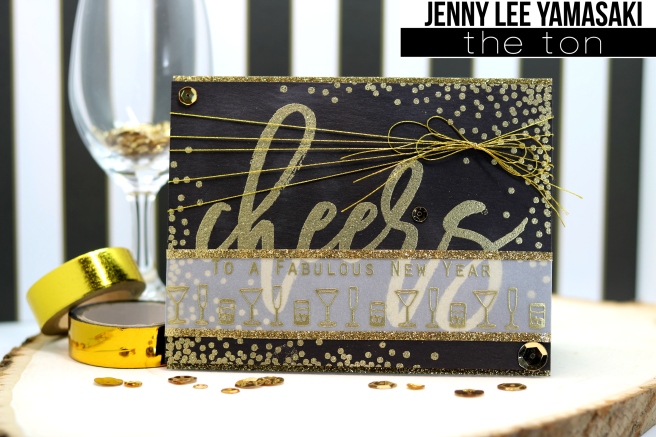
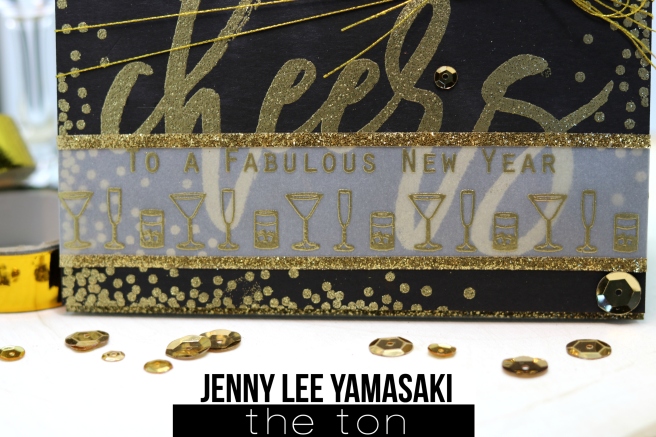
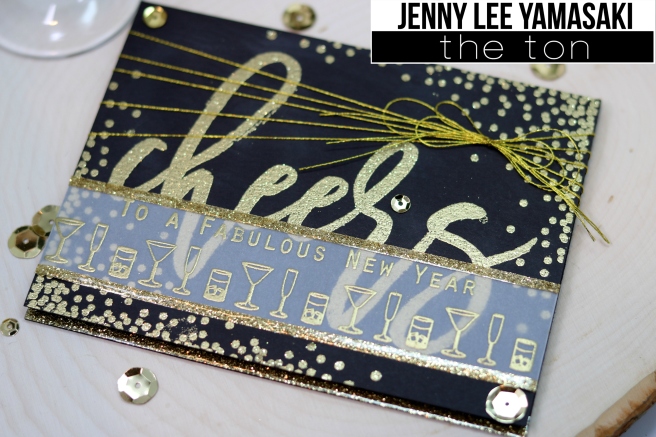
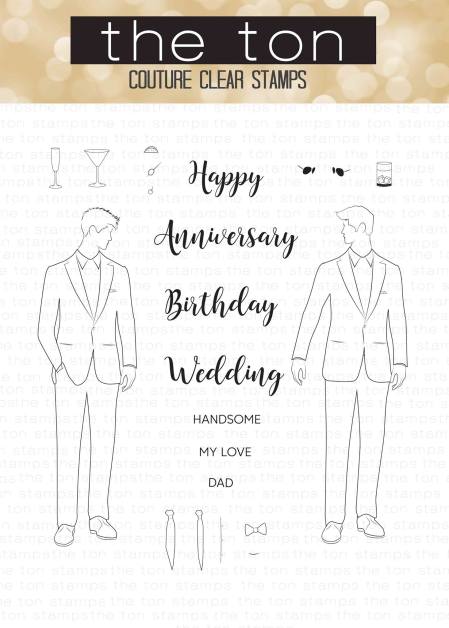
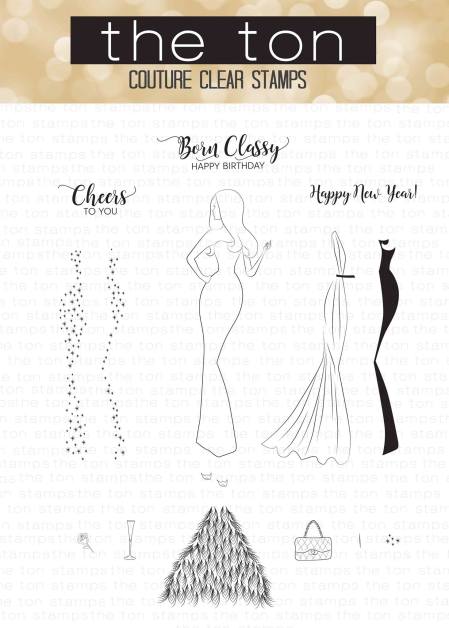
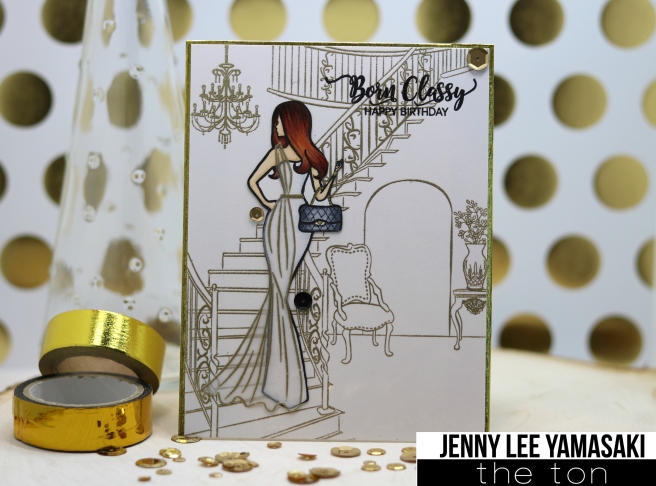
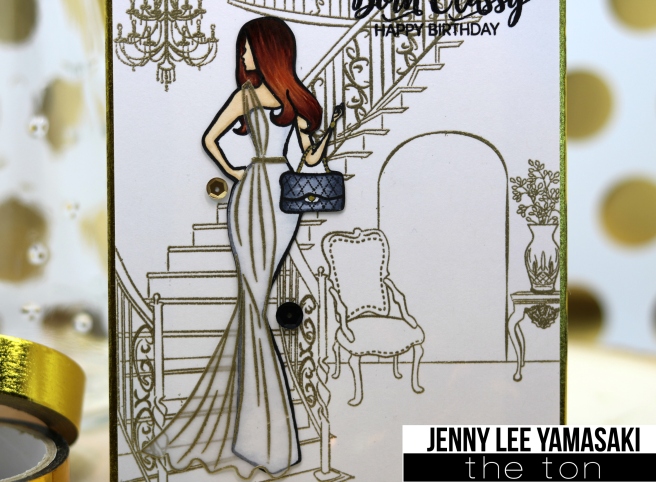
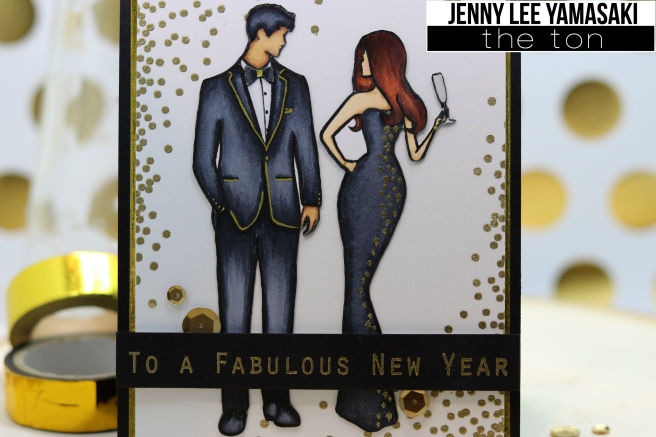
For this card, I used 3 new stamp sets – Born Classy, Plus One, and Holiday Confetti. I adore this beautiful couple! It’s so fun to dress them like paper dolls! If you remember the card I created for day 2 of the release week, I gave this gal a Greek goddess look! She wore a white dress with beautiful gold trimmed chiffon chiton. This time, she’s wearing a sexy black dress with gold sparkles. The handsome guy is wearing a black tuxedo with gold trims that matches his beautiful date! Don’t you think this couple is dressed perfectly for a formal New Year party? 🙂
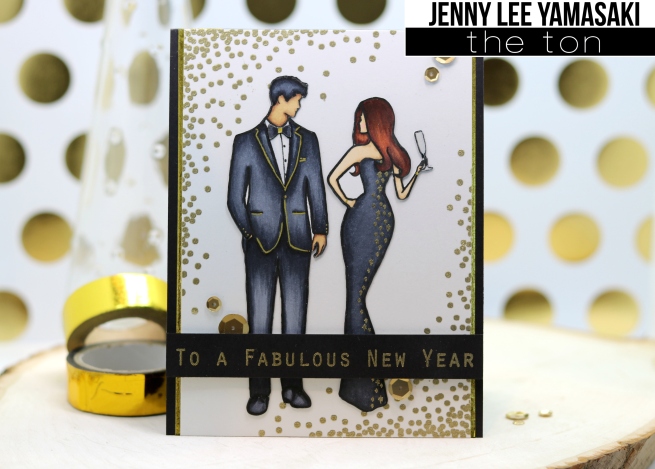
- I started the card by stamping the lady image from our new Born Classy stamp set and the man image from Plus One stamp set. I stamped both images on smooth white cardstock in our Copic friendly Caviar Hybrid ink. I colored both images with various Copic markers.
- For the lady image, I stamped the sparkle dress layer with embossing ink and heat embossed in gold. I drew in lines and dots with gold gel pen on the man image to add some interest. I fussy cut both images.
- On a smooth white cardstock, I stamped the confetti image from our new Holiday Confetti stamp set on 2 corners with embossing ink and heat embossed in gold. I trimmed the sides down slightly narrower than 4″
- I adhered our beautiful Gold Burnished Foil tape on the A2 black card base so it would peek through between the card base and the main panel.
- I stamped and heat embossed the sentiment in gold on a strip of a black cardstock.
- I adhered the main panel then the couple image. I adhered the sentiment strip with foam tape.
- I finished the card by adding some Matte Gold sequins.
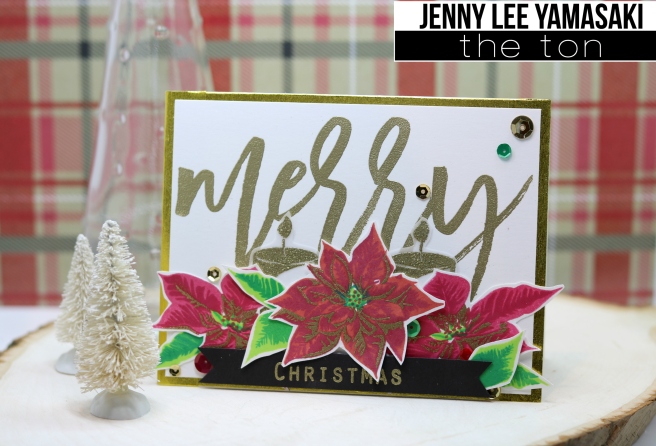
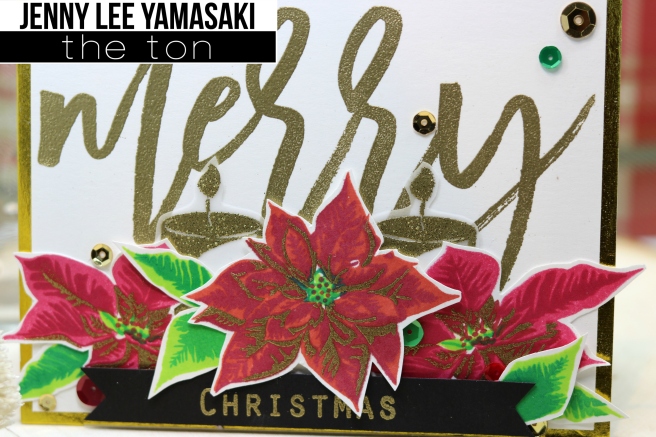
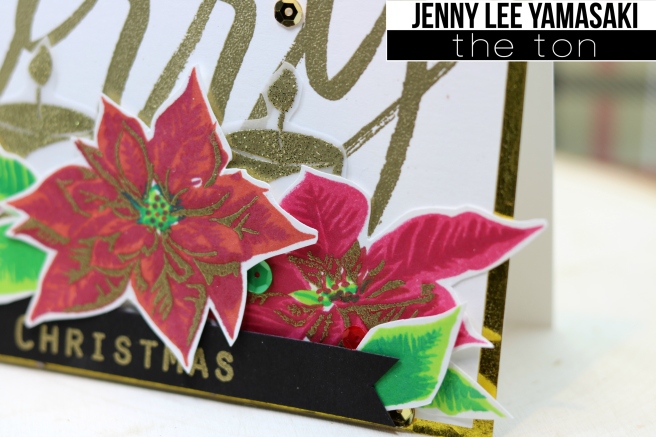
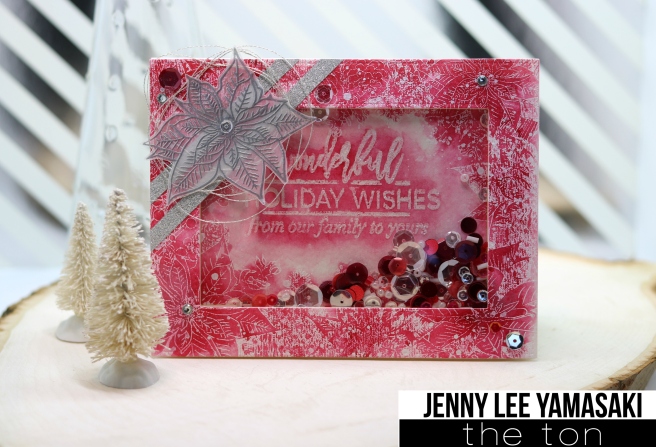
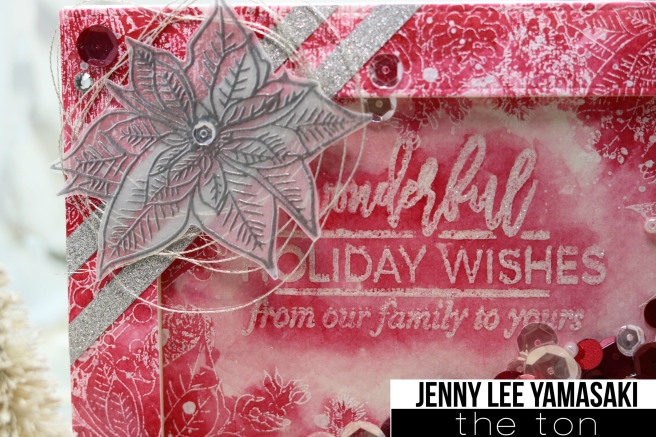
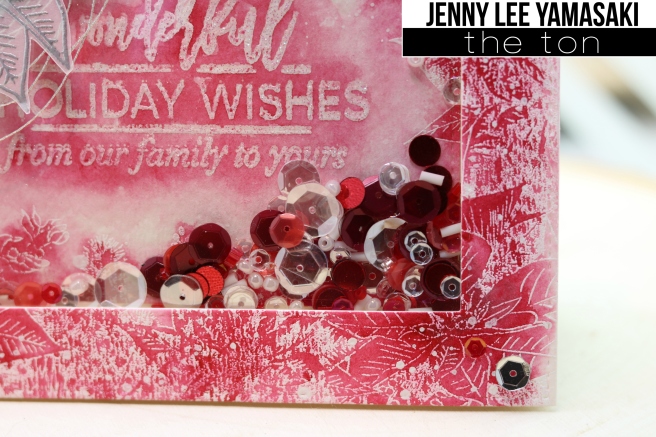
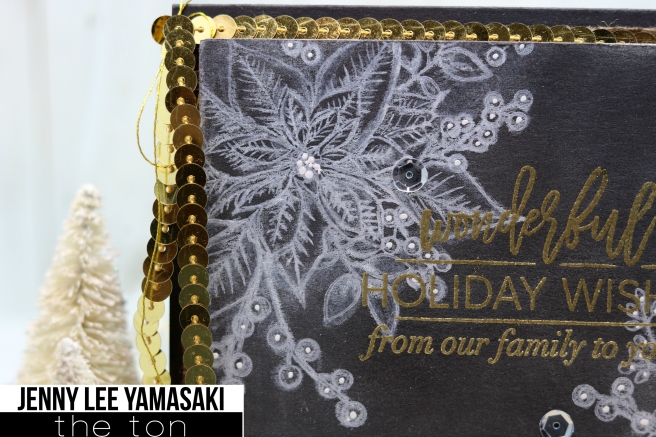
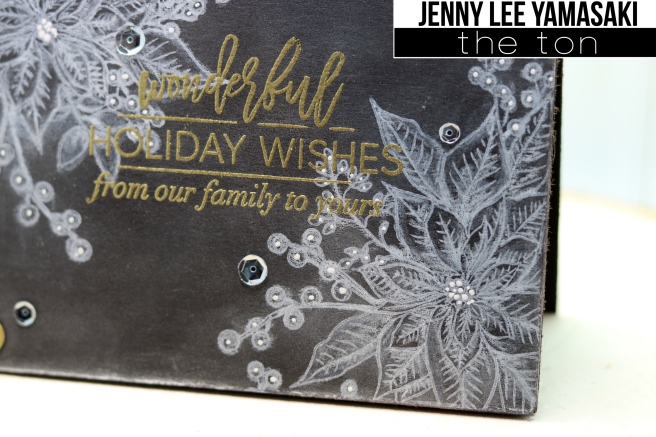
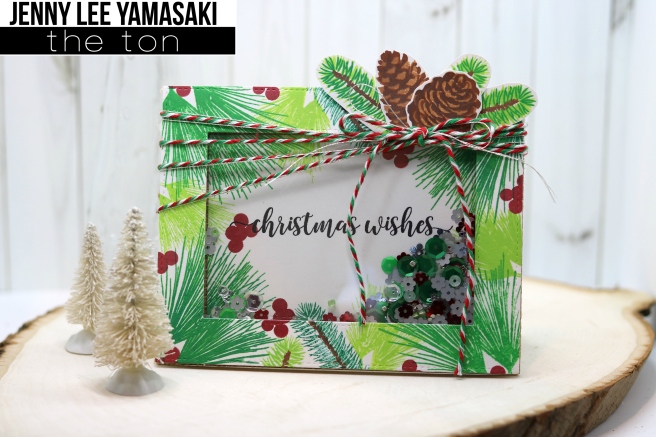
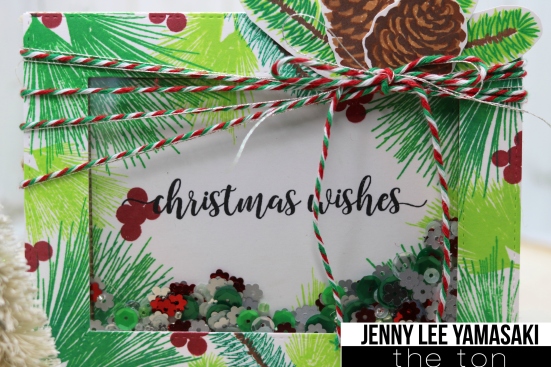
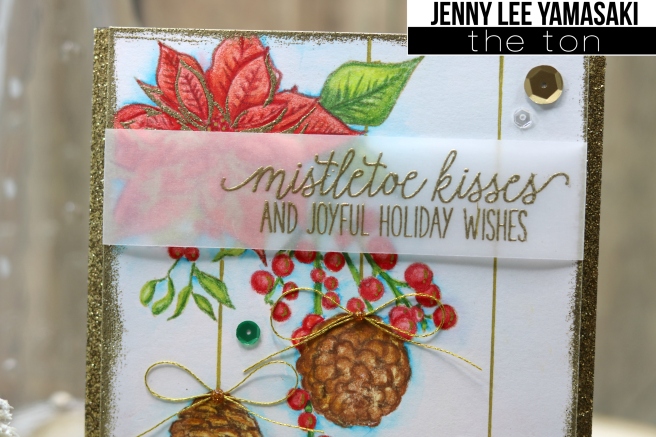
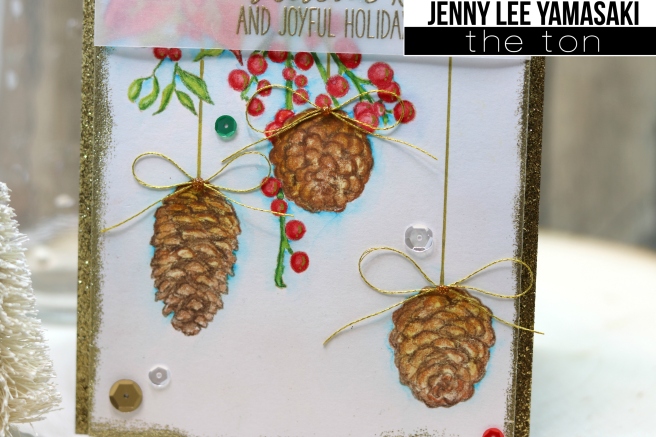
This second card was designed around the sentiment, “mistletoe kisses and joyful holiday wishes”. Mistletoe and pine cones are “hung” on gold threads, waiting for sweet couples to stop by for kisses. 🙂
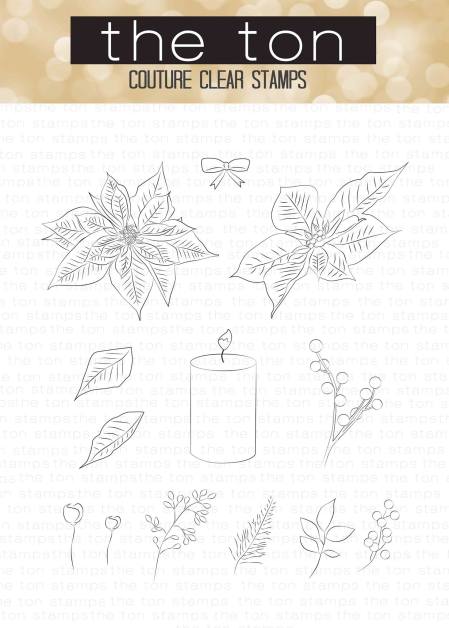
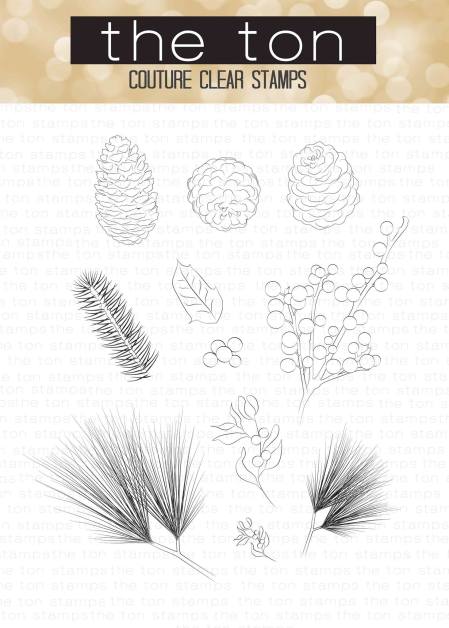
The sentiment is from our new Mistletoe Kisses stamp set, and I mix-matched various images from the Holiday Cones, Outline Holiday Cones, Fresh Cut Poinsettias, and Outline Fresh Cut Poinsettias stamp set.
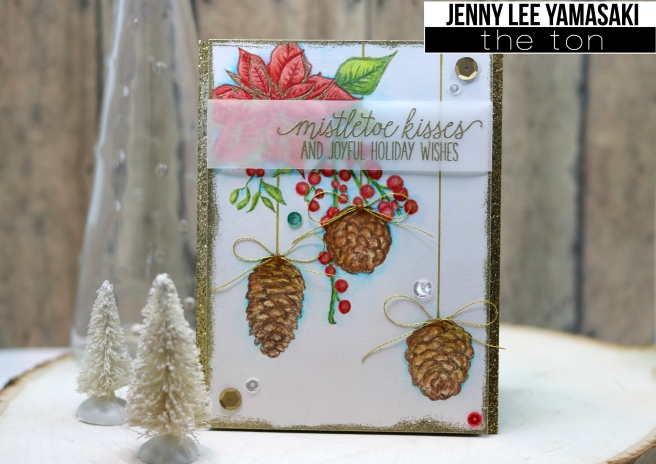
- First I planned where to stamp different images on the card and prepared masks accordingly.
- I stamped various images from the Holiday Cones, Outline Holiday Cones, Fresh Cut Poinsettias, and Outline Fresh Cut Poinsettias stamp set, using masking technique to achieve some dimensions. All images are stamped with our Warm Hazelnut dye ink for no-line coloring.
- I colored all images and the background with various Zig Clean Color Real Brush pens (blended with clear water) and let it dry completely. Then I added some details on the images with the Prismacolor color pencils. I also stamped a detail layer on the poinsettia image and heat embossed with gold glitter embossing powder.
- I drew in gold threads with gold gel pen. I also added some highlights on the berries with the same gel pen.
- I trimmed the panel down to 4″x5.5″, wiped the embossing ink around the panel, and heat embossed with gold sparkle embossing powder.
- I stamped the sentiment from our newMistletoe Kisses stamp set on a strip of vellum with the embossing ink and heat embossed in gold. I wrapped the sentiment strip around the panel and adhered it on the back. I also adhered black fun foam trimmed slightly smaller than the panel.
- On the A2 card base, I adhered strips of our Gold Adhesive Glitter paper on the vertical sides and adhered the main panel on top.
- I made some bows with gold thread and glued them on the pine cones and added bit of glitter glue on the bow.
- I finished the card by adding some sequins from our new Elf Stockings Couture Mix as well as our Matte Gold & Glass Slippers sequins.
That’s all from me for today and don’t forget to comment on every stop for maximum giveaway entries! Thank you for stopping by and I hope you enjoyed my cards as well as all of the beautiful projects from our team and the guests!
Your next stop is super talented Lydia Fiedler!
Have a blessed day, everyone!
Hugs,